Would you like to hear about webinars we're
doing, new features we're adding and projects we're undertaking? Sign up
here to our pleasantly infrequent newsletter!
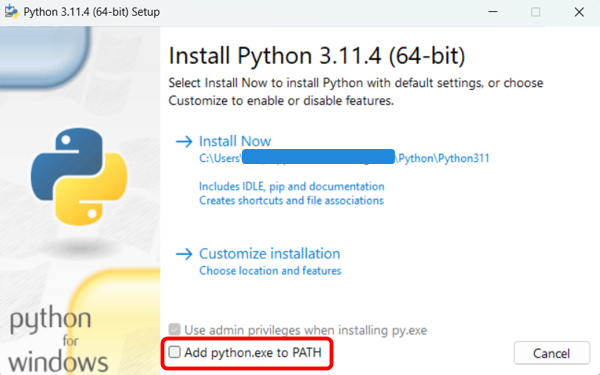
To interact with the Moveshelf API, you need Python and an integrated development environment (IDE) such as Visual Studio Code, PyCharm, or Spyder. This setup will allow you to run existing Python scripts from GitHub or create your own. This section walks you through setting up your environment to interact with the Moveshelf API using Python, and running a python script. While you can use any IDE that supports Python, this documentation provides instructions and examples specifically for Visual Studio Code.
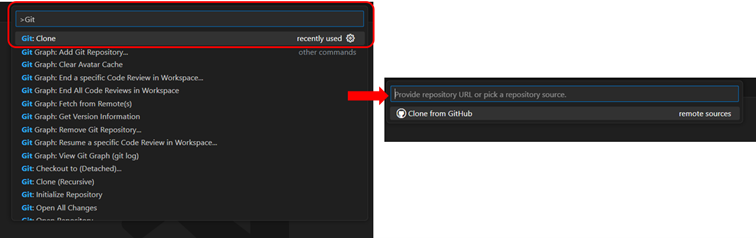
While using a Git repository is not required to use the Moveshelf API, it provides easy access to public resources from Moveshelf, e.g., moveshelf-data-examples. This section explains how to clone a GitHub repository and install its dependencies.
Install Git
Install the lastest version of Git on your computer.
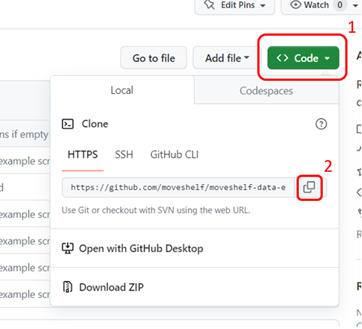
Clone a GitHub repository to your local machine
Create an account on GitHub to be able to use the public repositories
Select a local folder where you want to clone the repository
Install dependencies
To ensure your Python script runs without errors, it's best practice to list all required modules (along with their versions) in a requirements.txt file. To install these dependencies automatically:
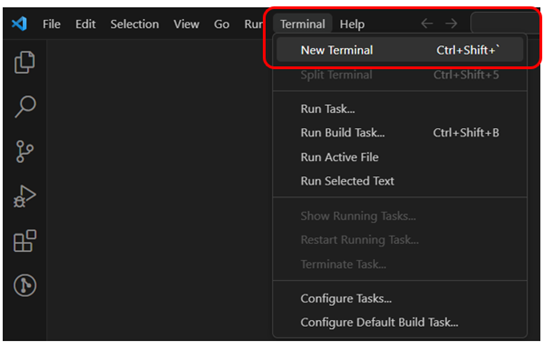
Open a new terminal in Visual Studio Code
Run the command: pip install -r requirements.txt in the terminal and press 'Enter'
Make sure your terminal is in the correct folder where the requirements are saved as well.
This section walks you through the steps you need to execute the first time you want to use the Moveshelf API.
Installation
You can install the Moveshelf API directly via PyPI. To install the newest version available, run the following command in the terminal:
pip install -U moveshelf-api
Creating an API key
Before you can use the Moveshelf API, you need to create an API key:
Go to your profile page on Moveshelf by clicking on your profile avatar in the top right and select 'Settings'
Follow instructions to generate an API key (enter ID for the new key), and click 'Generate API Key'
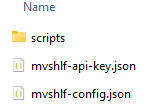
Download the API key file and save 'mvshlf-api-key.json' in the root folder from where you will run your scripts (e.g. your cloned GitHub repository). Please note that it is important to keep your API Key secure.
Setting up 'mvshlf-config.json'
Additionally, you need a file called 'mvshlf-config.json', saved in the same folder as 'mvshlf-api-key.json', with the following content:
To help you get started even faster, we provide a recording of a live training session that demonstrates how to install and configure the Moveshelf API, and how to create a Python script from scratch to import data from a session to a newly created subject on Moveshelf. You can access the full video here:
▶ Moveshelf training - How to import historical data.
Never commit/push your API key file (for example 'mvshlf-api-key.json') to a versioning system (eg: git). Always make sure you are not tracking it (e.g. by adding it to your '.gitignore' file), so it stays out of the repository even if you forget to exclude it manually when committing.
Never paste the key content into support tickets, screenshots, logs, or chat messages, even when asking for help.
Revoking an API Key
If you don't need an API Key anymore or if you suspect your API key has been exposed, revoke it immediately from your Moveshelf profile:
Go to your profile page on Moveshelf by clicking on your profile avatar in the top right and select 'Settings'
In the list, find the API key you need to revoke and click the button in the 'Revoke' column
A modal will appear with the message "Do you want to revoke the following API Key?" and the key name. Click the 'Revoke' button to confirm
Rotating API Keys
It is advised to revoke the API Key and generate a new one every 3-6 months, even without known security incidents. Regularly rotating API keys is one of the most meaningful protections for a machine credential, where protections used for human logins (such as 2-factor authentication) can't be applied. To rotate your API key:

 Search Knowledge Base