Share
Account settings
Supported devices
The Moveshelf application This is what we call our product; ‘Moveshelf application’. In the knowledgebase referred to as ‘the application’. is customized for each of organization (customer) that we work with. This allows us to guarantee data security and organization specific preferences. Each organization has their own Moveshelf subdomain (< subdomain >.moveshelf.com) with their separate data storage, which is access controlled. Your organization’s account is set up to only allow access to predefined email domains.

To access the Moveshelf application, click on a link you might have received from a colleague or available in the patient file in your
Electronic Health Record (EHR). This link will redirect you to all multi-media movement data of the
subject or patient in question. Before you can access this data, you will have to login on Moveshelf. Continue reading below for information regarding login.
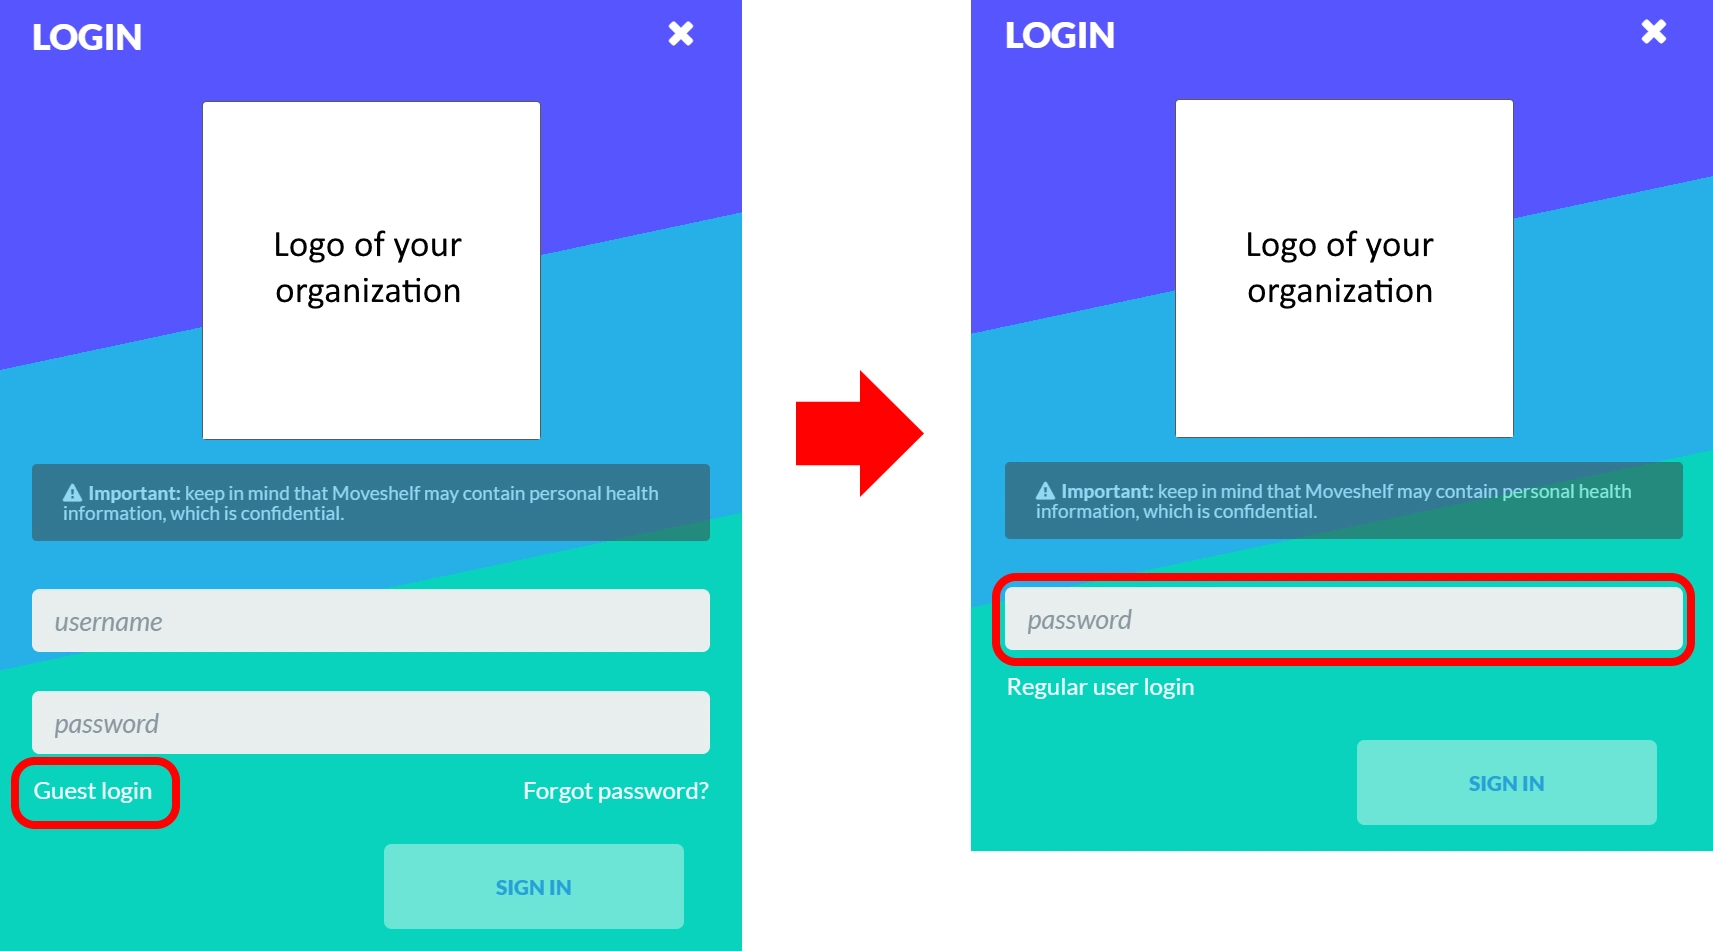
The picture on the right shows the default login window of Moveshelf.
Password login

Login with your business email address and password you have signed up with, or as an external user with the username and password you have received.
- Reset password
Did you forget your password? Click on 'Forgot password?' to reset your password. You will receive an email within a few minutes to set a new password. Please also check your spam folder for the email. - New to Moveshelf?
If you don’t have access yet, please contact your Organization’s Moveshelf admin to receive an invitation.
SSO login

This feature is optional and only visible to Enterprise customers with this feature enabled.
Click on ‘Login with Microsoft Active Directory’ or ‘Login with Okta Workforce Identity’ to login with your Microsoft / Okta account.
Guest login
This feature is optional and only visible to Enterprise customers with this feature enabled.
Organization roles
| Owner | Member | External | |
|---|---|---|---|
| Create new projects | X | ||
| Add new users | X | ||
| Add existing users to a project | X | X | X |
External users
- Temporary external users, with access to one subject only. Such users are created using the 'Share' button (see Share a subject externally), and can be used for example for referrers from other hospitals.
- Permanent external users, with access to a complete project. Such users are created using the 'External' checkbox when adding a member to a project, and can be used for example for collaborating on a research project.
Project roles
| Admin | Editor | Viewer | |
|---|---|---|---|
| Add members to a project | X | ||
| Remove members from a project | X | ||
| Delete project | X | ||
| Change/remove the metadata template and project configuration of a project | X | ||
| Edit data | X | X | |
| View data | X | X | X |
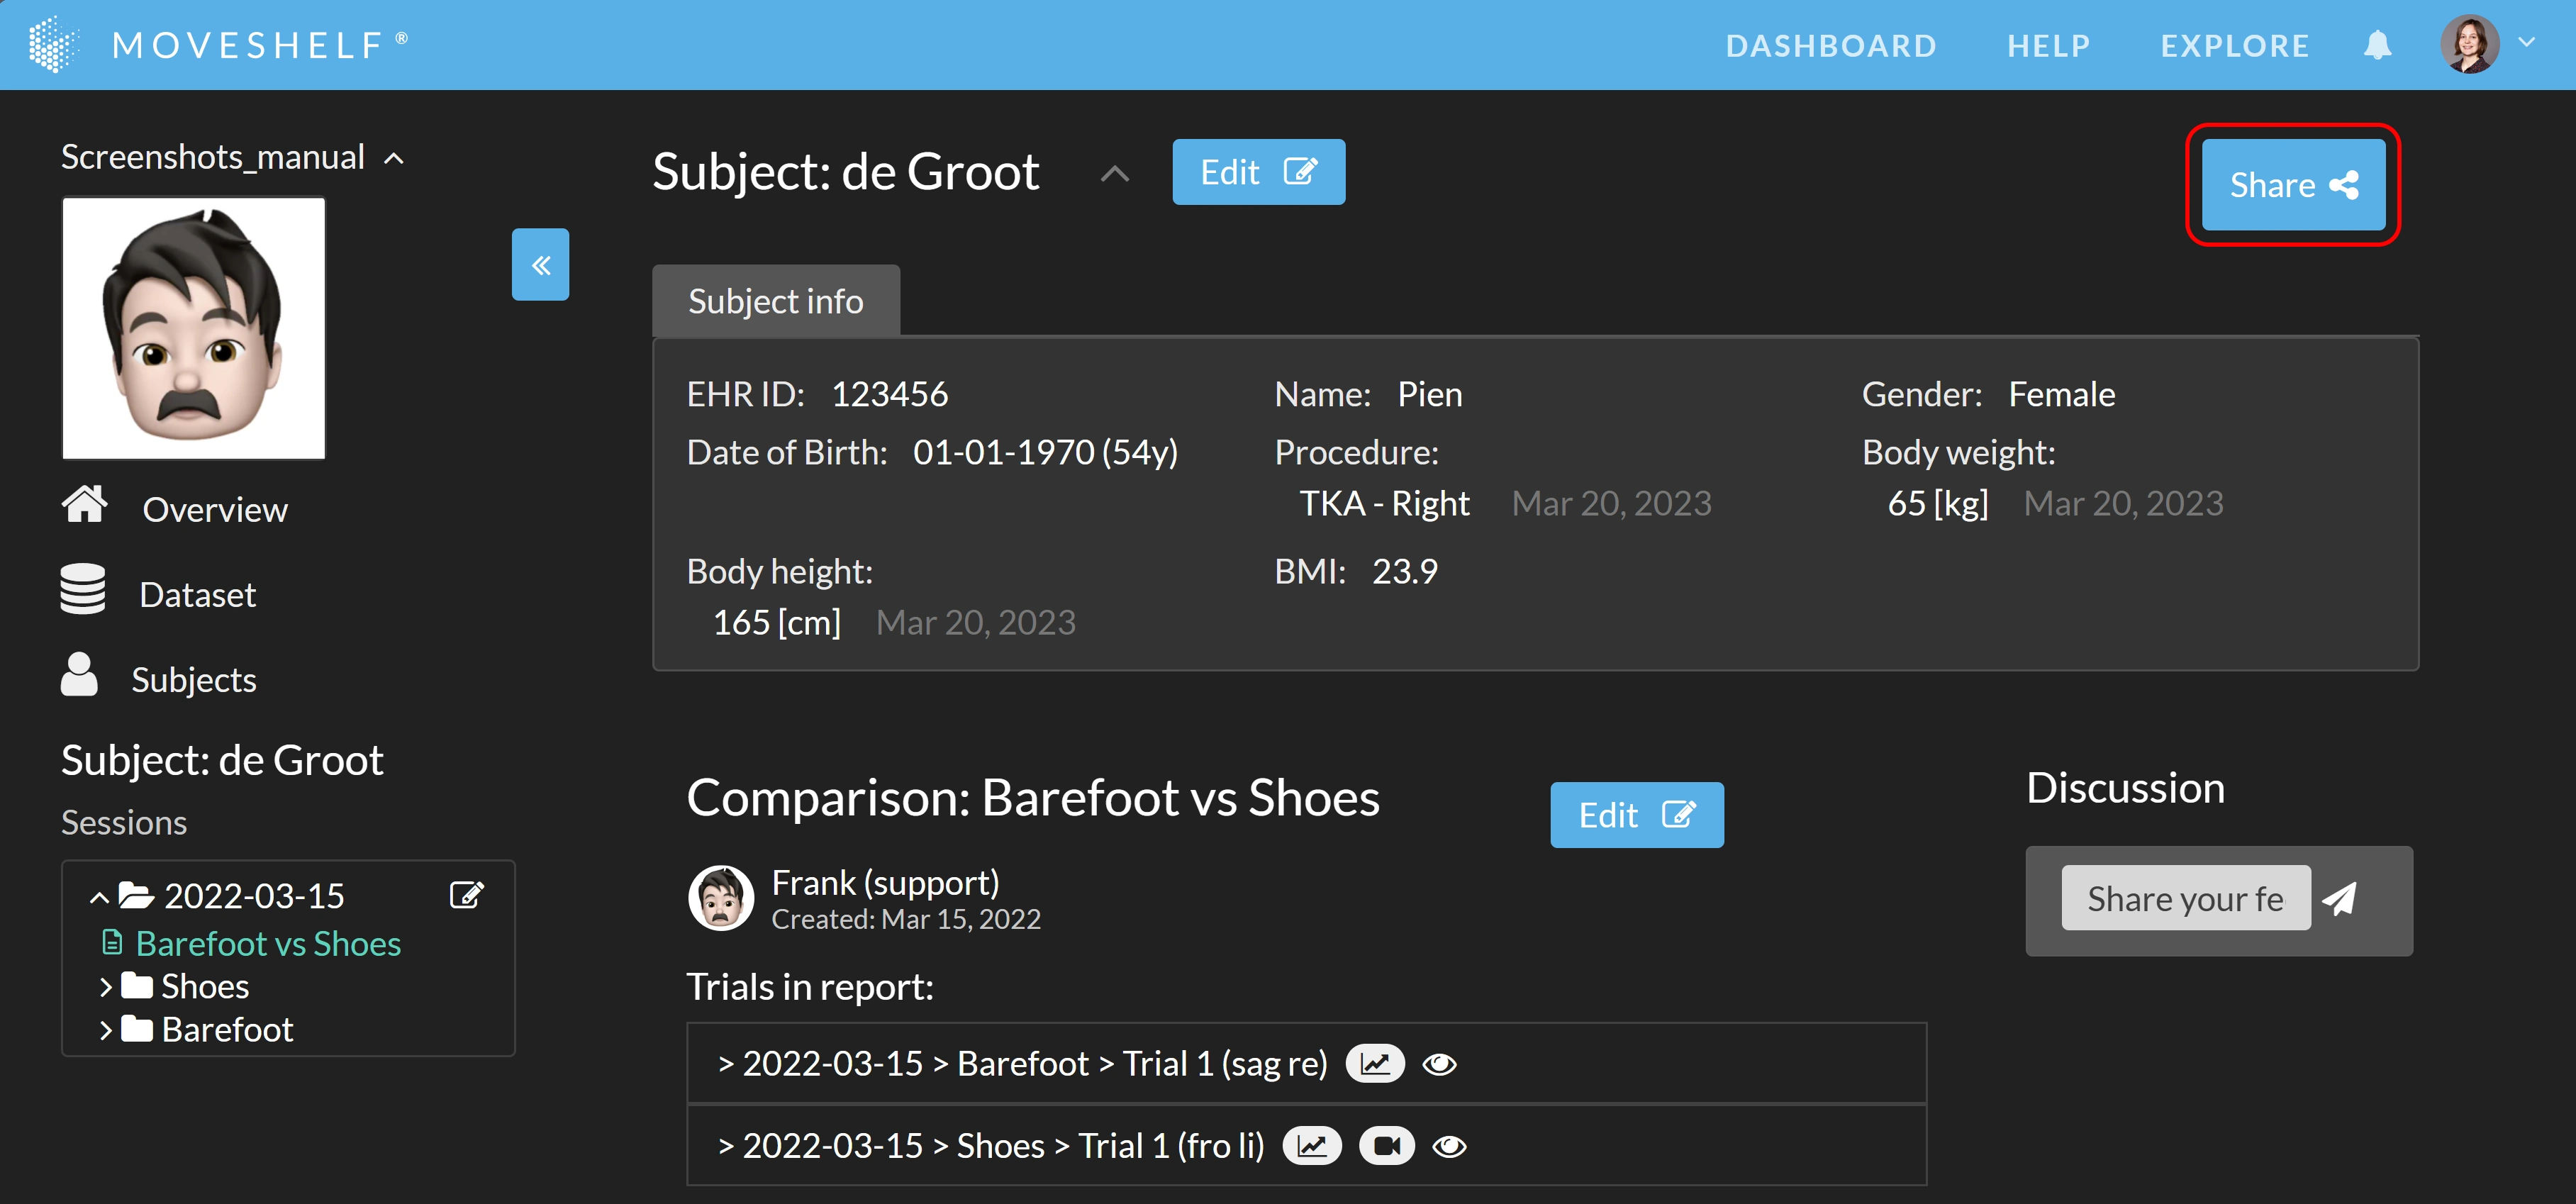
Share button
Share internally
- Click ‘Share’ on top of the page that you would like to share with others (see picture below). This can be a trial, report or the subject home page.
- Select either ‘Copy link' or ‘Send email’ to share the relevant URL.
Share with a guest user
Follow the same steps as above, only select ‘Create link for users without single sign-on’. This adjusts the URL to allow guest login, avoiding the automatic SSO login screen when your organization has this enabled.
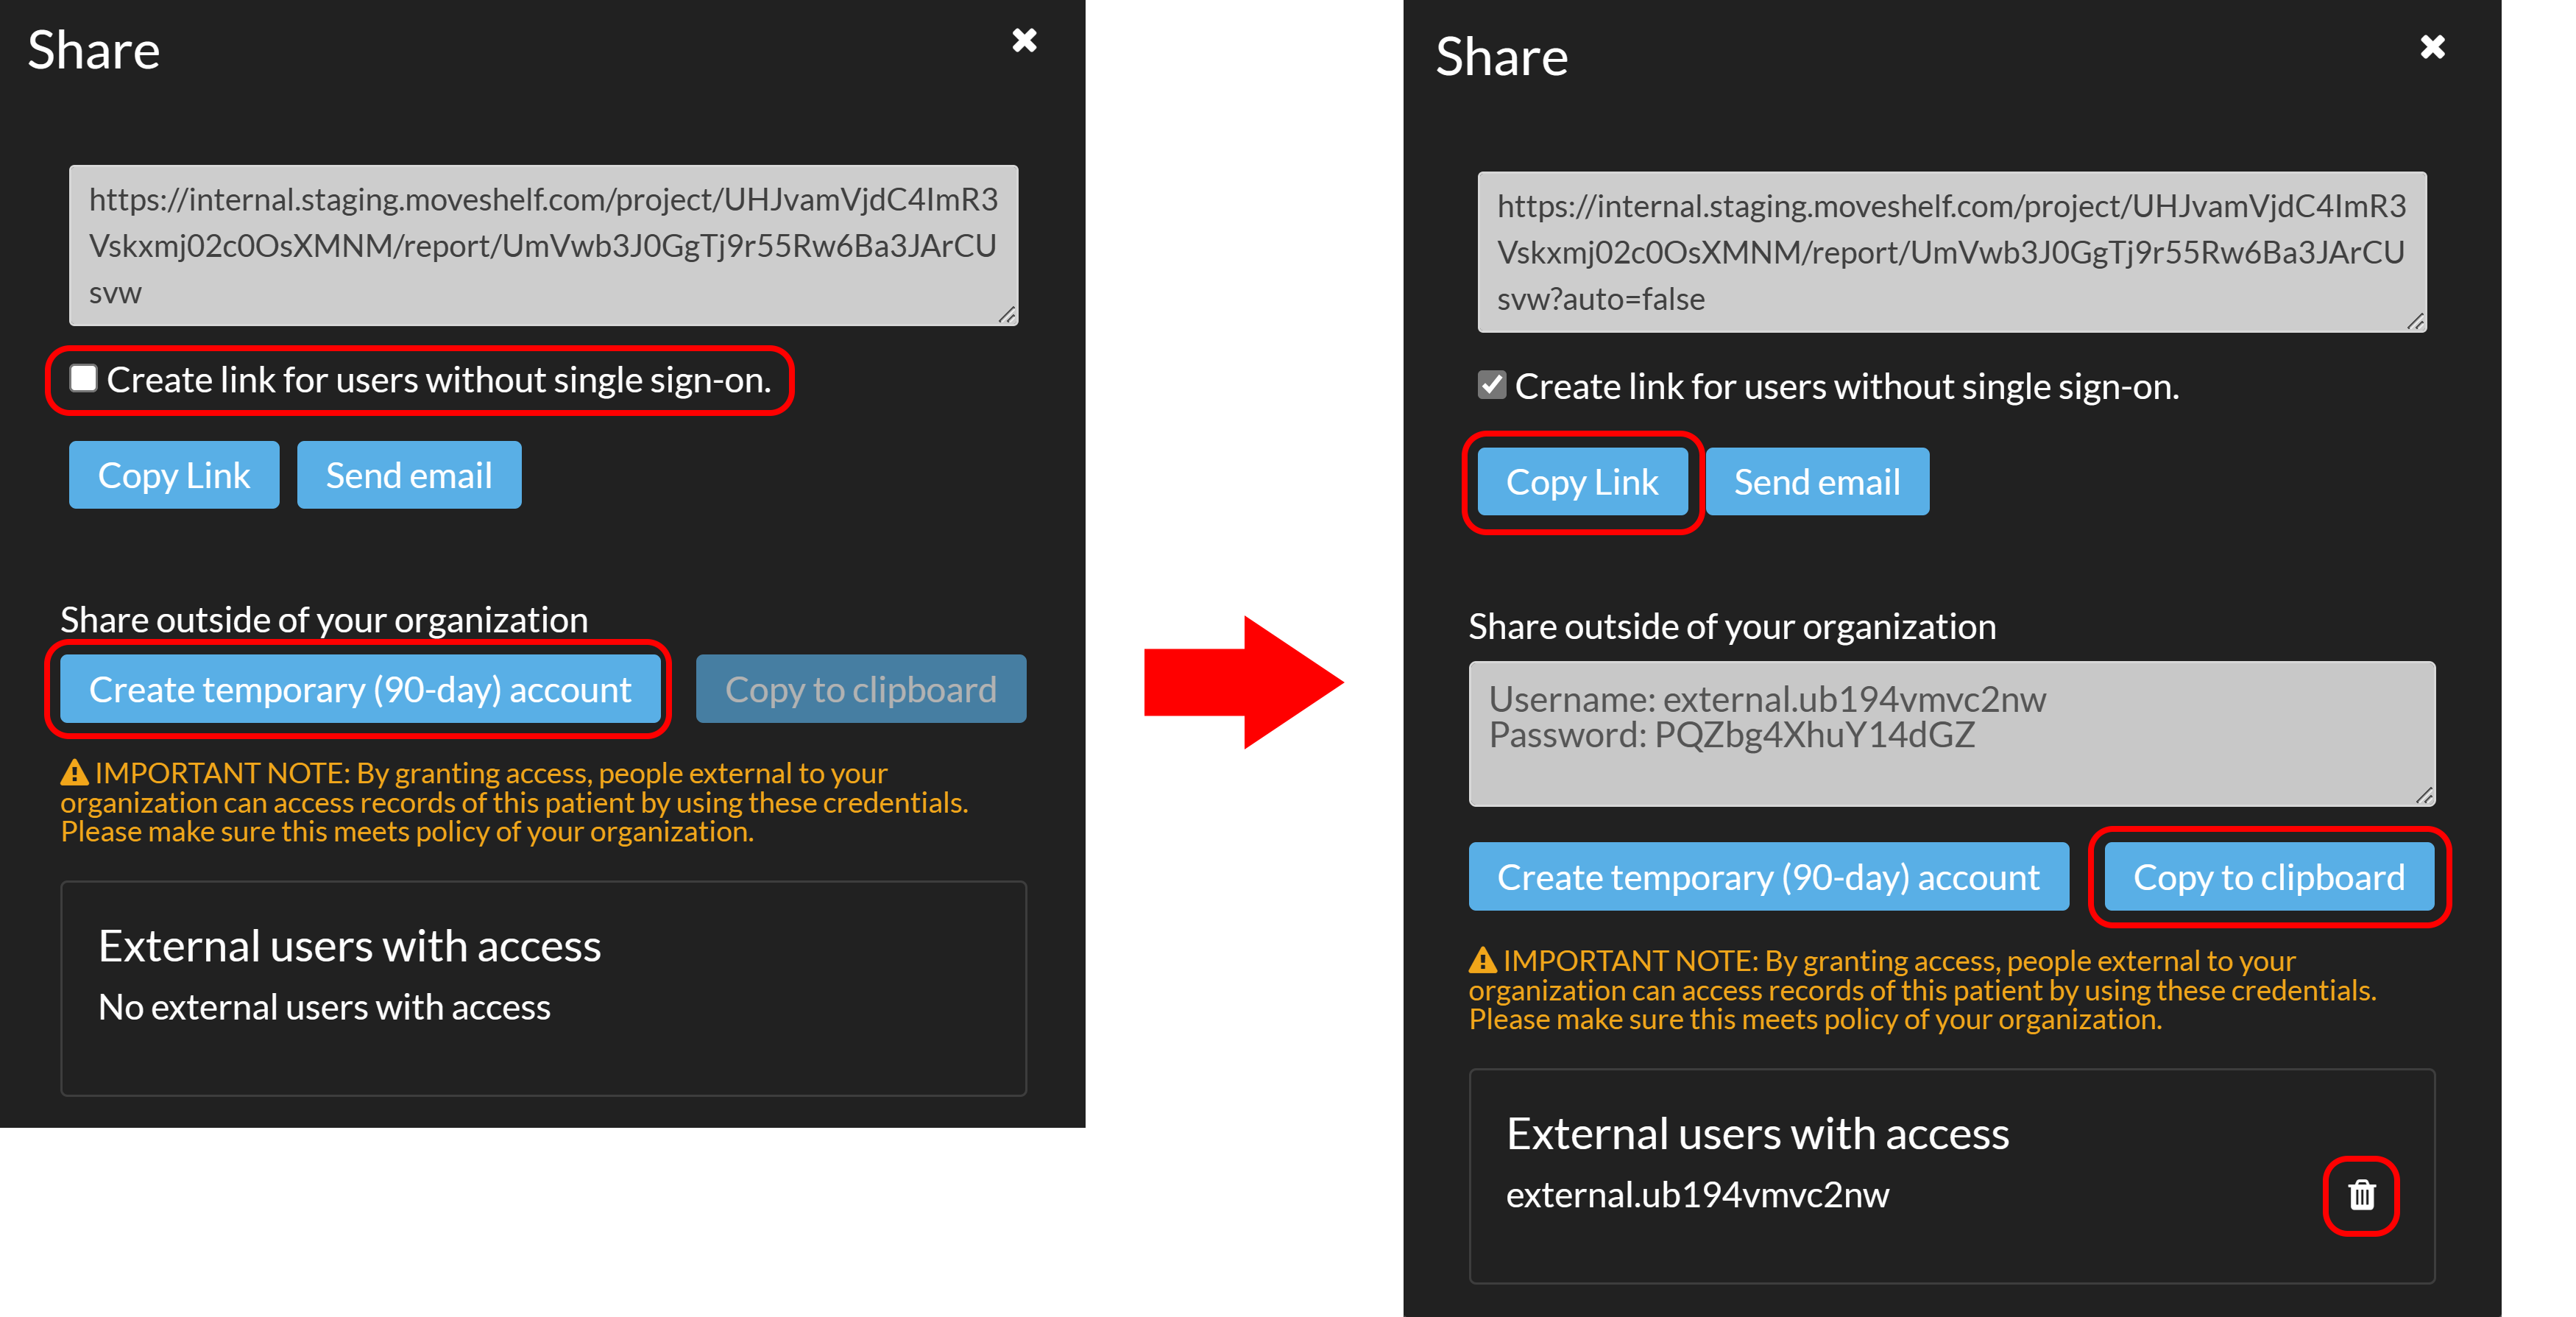
Share a subject externally
This feature is optional and only visible to Enterprise customers with this feature enabled.
Follow the steps below:
- Click on the 'Share' button of the page. This can be a trial, report or the subject home page.
- Select 'Create temporary (90-day) account' and copy the credentials to your clipboard. Make sure you save these credentials to be able to share these with the external person. The credentials will only be shown once.
- Select 'Create link for users without single sign-on'. This adjusts the URL to allow login with a username and password, avoiding the automatic SSO login screen when your organization has this enabled.
- Copy the URL by clicking 'Copy Link'.
- Share the URL and the saved credentials with the external person and help them on their way by sharing this information on Password login workflow.
- To manually revoke access (e.g. earlier than the automatic 90 days limit) you can delete the external user from the subject by clicking on the recycle bin from the same window which you've used for inviting the user.
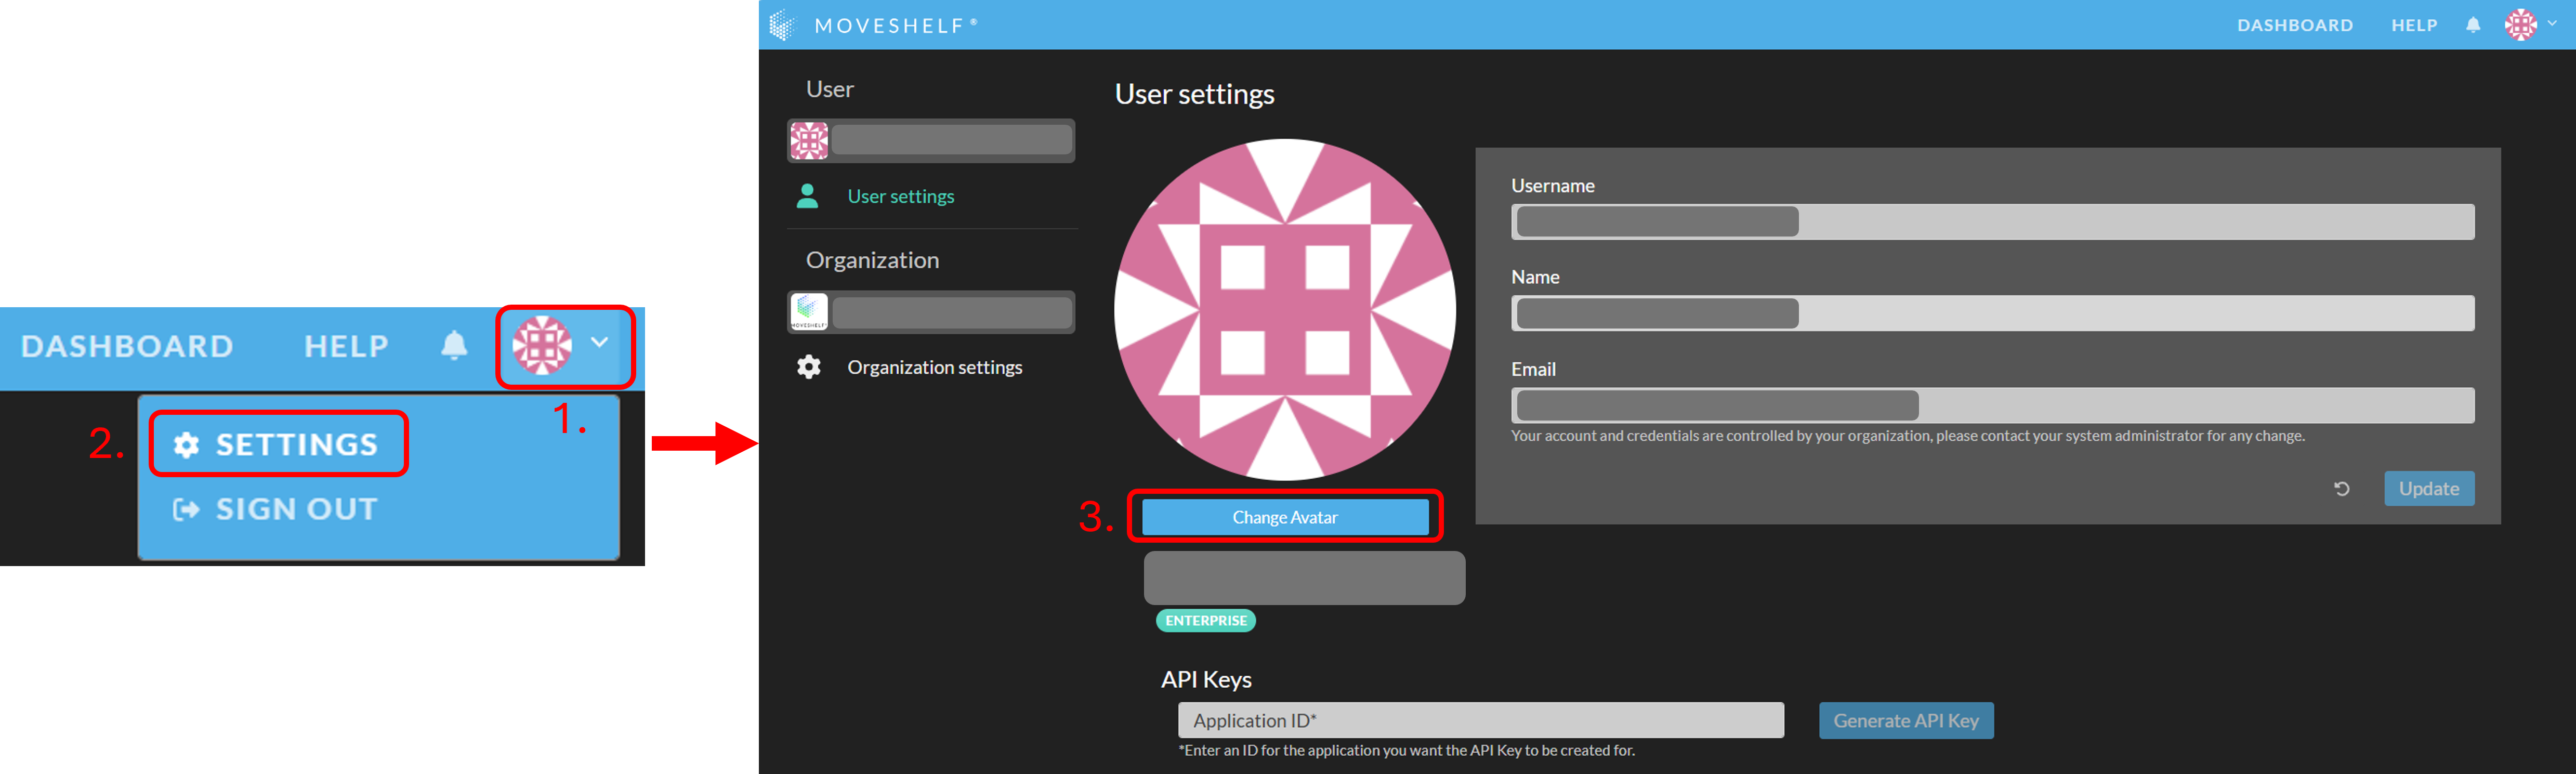
Change profile avatar
- Go to your personal profile page by clicking on your profile avatar in the top right and select 'Settings'.
- Click on 'Change avatar' and select an image.
- Crop the image if needed and click on 'Save'.
Supported devices & browsers
The Moveshelf application is currently designed for Windows and Apple laptops and desktops. Usage of a tablet or mobile phone is not supported.
The Moveshelf application is not compatible with operating system versions older than the following versions:
- Windows 10
- MacOS Version 14
The Moveshelf application is supported on Google Chrome and Microsoft Edge. Specifically, we maintain support for the “Extended Stable” release channels of Google Chrome and Microsoft Edge.
Other modern browsers such as Mozilla Firefox and Apple Safari may also be supported, but are tested less extensively by our Quality Assurance team. Please contact Moveshelf support if you wish to use these browsers and experience issues. Microsoft Internet Explorer is not supported.
We recommend the following system specifications for optimal use of the Moveshelf application:
- A minimum of 50 Mbps download speed.
- A minimum of 30 Mbps upload speed.
- A screen resolution of 1920x1080 is considered the standard screen resolution for optimal use of the Moveshelf application. Different resolutions may cause layout issues.
- CPU: Intel® Core™ Ultra 7 155H or a CPU with equivalent or better performance.
- Graphics Processing Unit (GPU): Intel® Arc™ or a GPU with equivalent or better performance. Although the Moveshelf application supports machines without a graphics processing unit (GPU), the performance of some components, such as the 3D player, will be degraded by the lack of a GPU.