To run the biomechanical evaluation processor it is important that every condition contains trials that are marked correctly, meaning: at least one trial needs to be marked
'right' and one trial marked as
'left'. Note that the trials also need to have data included to succesfully run the biomechanical evaluation. Go to
Explore a condition for more information on how to mark trials manually.
Once you have uploaded and annotated the data on Moveshelf, you are ready to run the Biomechanical Evaluation processor. If the selected data is missing laterality context, more than three trials are selected within a condition or other deviations from Shriners' general workflow, a warning or error will be displayed on Moveshelf together with a description of the reason. The word report will be produced but dependent on the warning cells will remain empty and final scores will be calculated based on limited data. To produce the biomechanical evaluation report please follow the steps below:
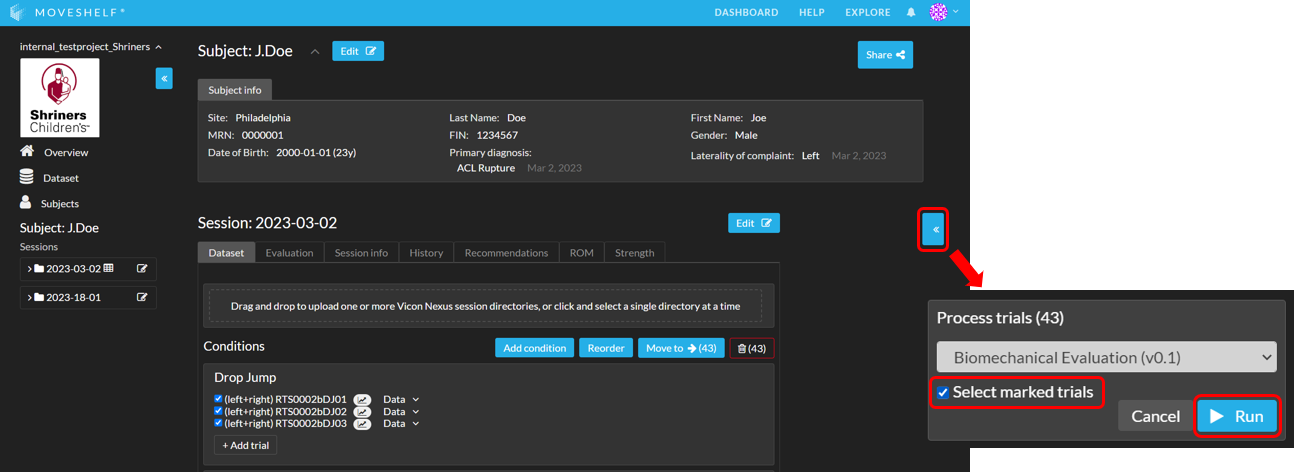
- Navigate to the Session home page, open the 'Processors' tab and select 'Biomechanical evaluation' (see image).
- Select the 'Select marked trials' checkbox. This checkbox selects all trials that were marked as 'left', 'right' or 'left + right'.
- Click on 'Run'.

Note that running the biomechanical evaluation processor will delete the existing biomechanical evaluation of a session.
- When the processing is completed successfully, the tab 'Evaluation' next to 'Dataset' shows the biomechanical evaluation results. As shown in the image below, all values (max 3 per side) of the individual trials are shown in the tables of the individual test results.
In this tab you also have the option to download this biomechanical evaluation as a Word report. Click on Download report to download the biomechanical evaluation report.
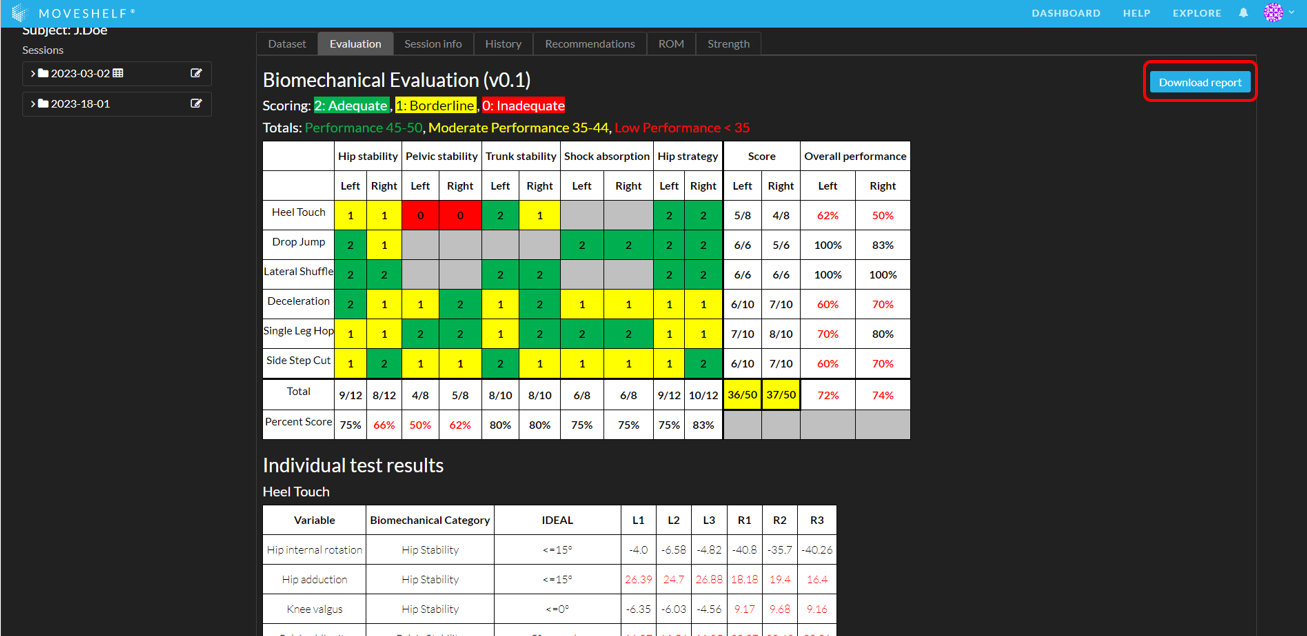
Keep in mind that the Category results are not shown on Moveshelf, but are visible in the Word report.