Would you like to hear about webinars we're
doing, new features we're adding and projects we're undertaking? Sign up
here to our pleasantly infrequent newsletter!
This feature is optional and only visible to Enterprise customers with this feature enabled.
On Moveshelf you can automate the process of grouping multiple files into trials, by uploading a Vicon directory. For general information about how to upload a directory see the section directory upload.
A Vicon session folder. Commonly this is a direct child of the Subject folder. For the upload to work, this folder should include:
xxx.Session.enf file. This file is used to detect a Vicon session
xxx.Trial.enf or xxx.Trialxx.enf files. This file is used to detect trials within the Vicon session
.C3D files (optional)
.avi files (optional)
.PDF files (optional, see note below for specifications)
.mp4 files (optional, see note below for specifications)
An additional filter can be added to your Vicon directory upload settings to include alternative file types like PDF (or pictures or tables) and .mp4 video (standalone video or foot pressure recordings) in your Vicon directory upload. These files will be automatically put into separate trials. These alternative file types can be uploaded automatically as a child folder within the Vicon session or present it as a separate folder after your Vicon session is done uploading.
Vicon Nexus 2.13 and higher exports videos with a new transcoder (H264). We recommend using this version of Nexus for shorter upload (processing) times on Moveshelf.
Vicon data structure requirements
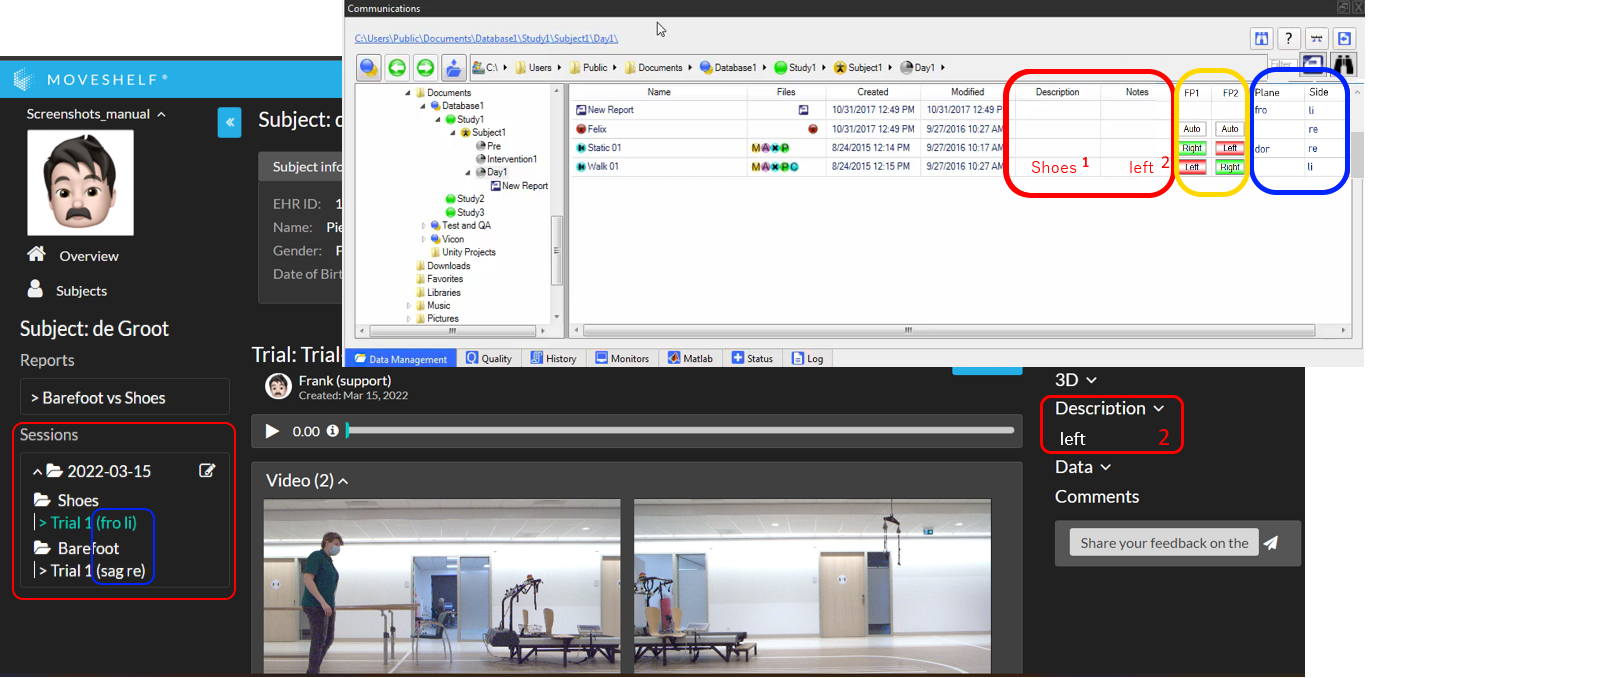
For automatic categorization of your Vicon directory upload to work out of the box there is a default data structure that Moveshelf has implemented already (see images and description below). Also without this data structure you can upload any Vicon session folder successfully on Moveshelf, but your trials will not be automatically categorized into conditions. Please see Image 1.
Automatically categorize trials into conditions
Fill in the Description field in Vicon Nexus with the name of your condition. Moveshelf will read this and categorize your trials into these conditions (Image 1, in red).
Automatically add a description to a trial
Populate the Notes field in Vicon Nexus to fill the Moveshelf description field.
Automatically show information on the content of a trial
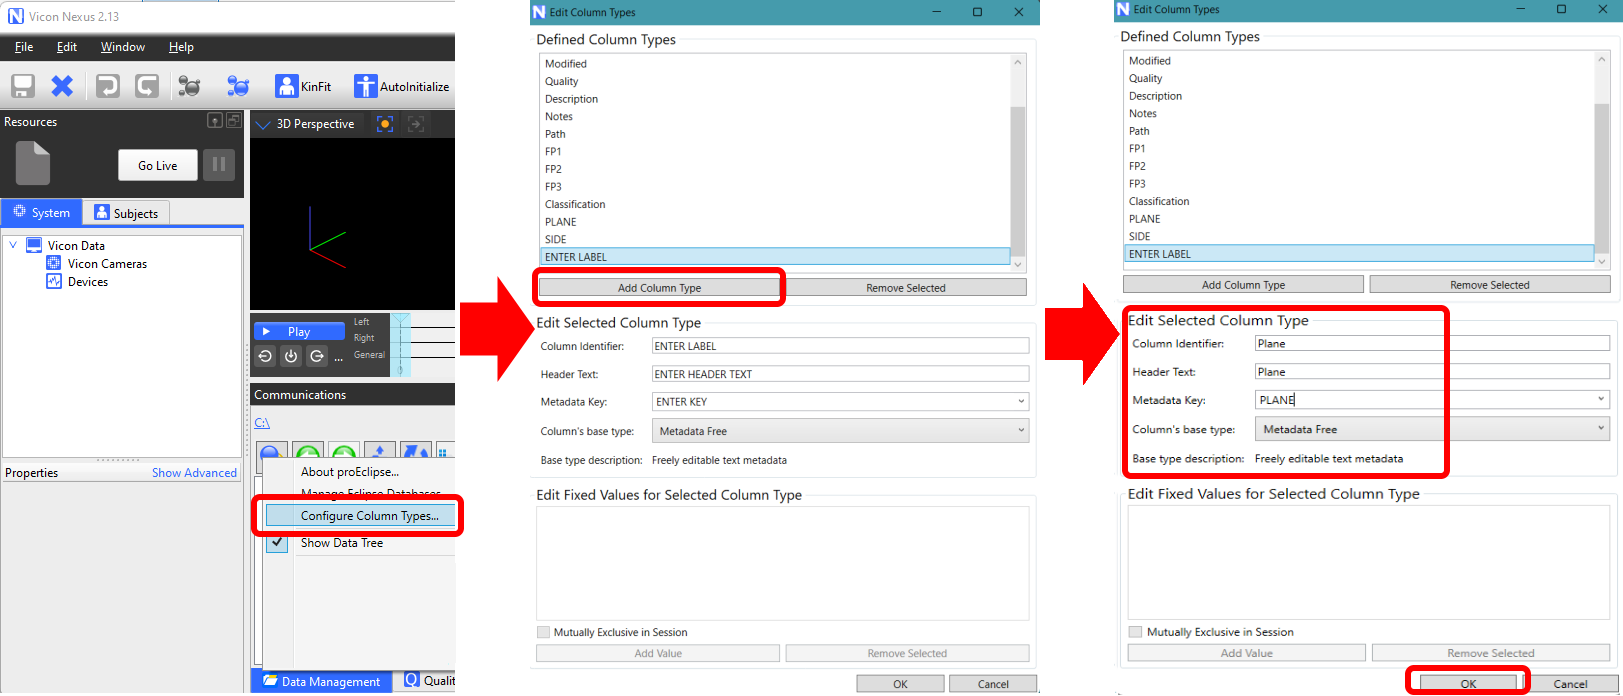
Show the content of a trial (laterality/plane) next to the trial name in the navigation menu on the left side of the screen (Image 1, in blue), by creating custom colums named 'Side' and 'Plane' in Vicon Nexus. Populate these columns with 'li' (links) or 're' (rechts) to indicate the side, and 'fro' (frontal) or 'dor' (dorsal) for the plane. If the column Plane is empty, Moveshelf will assume the plane is sagittal. See an example of this in the Nexus screenshot below, and the result of it in the navigation menu on the left side of the image, where the trial name Trial-1 is followed by '(fro li)'. Please see Image 2 for the steps how to create the correct columns in Nexus.
Only show valid force data on Moveshelf
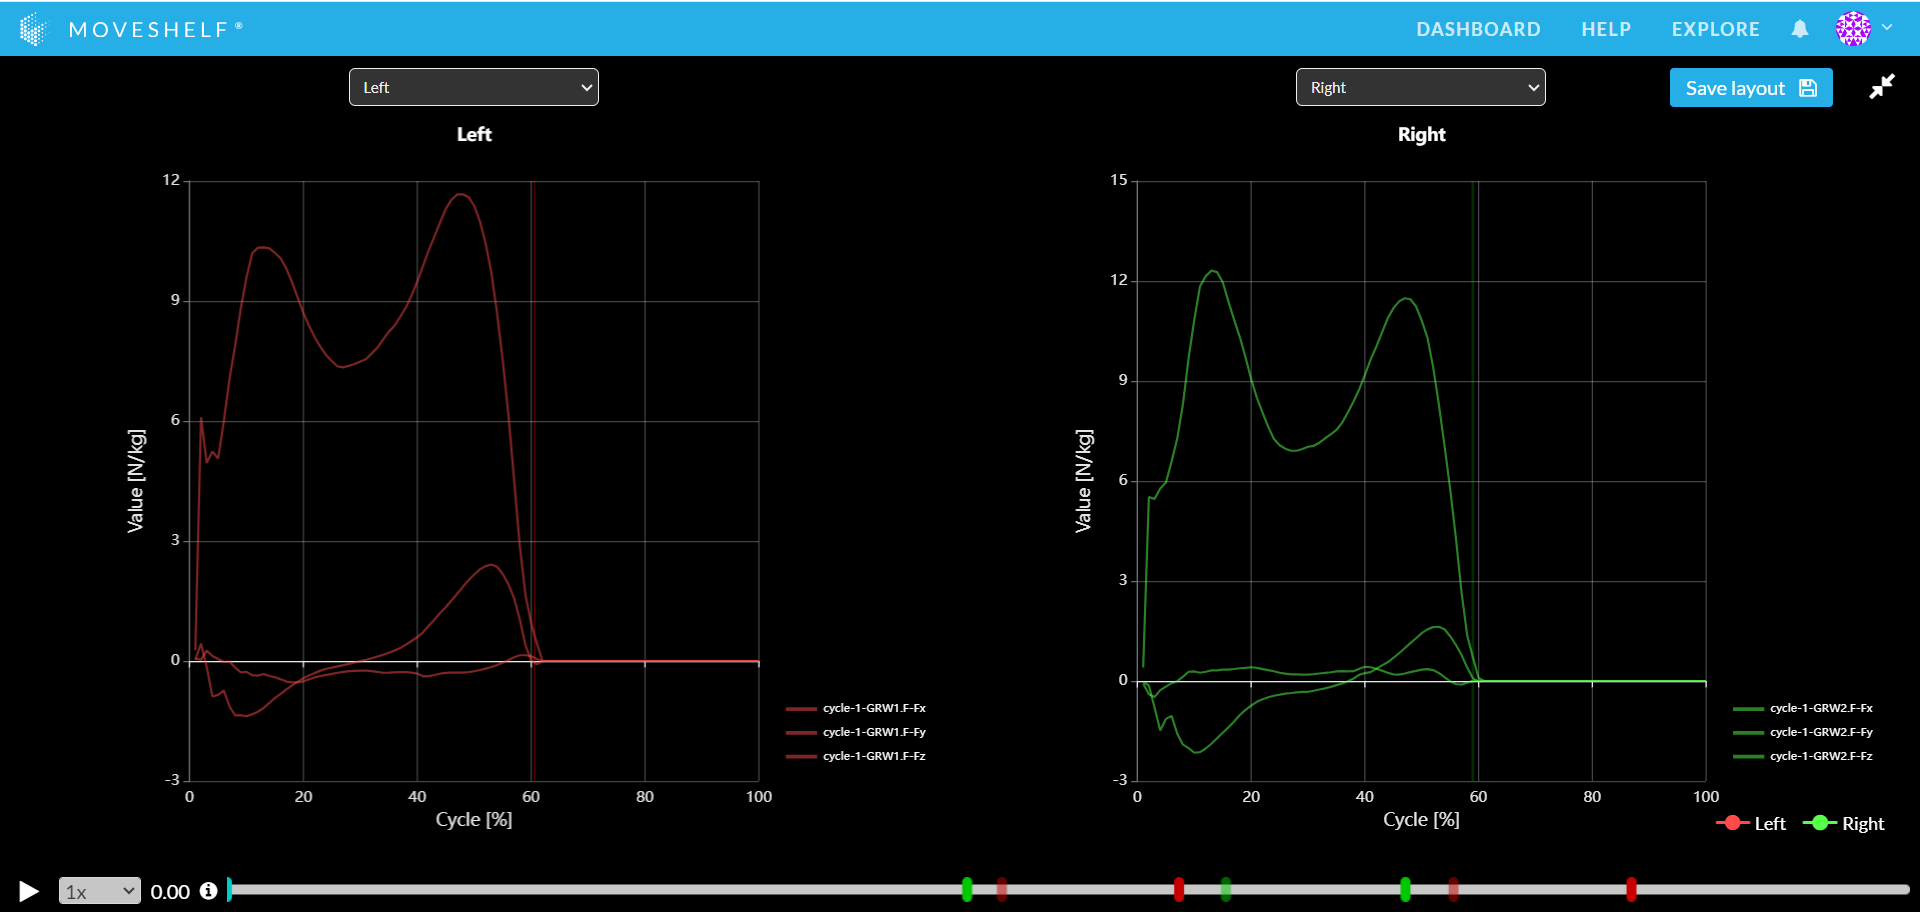
In Vicon Nexus there are standard columns for force plates (in this example: FP1 = force plate 1 and FP2 = force plate 2, however more force plates are supported). For every trial, enter the information for a good hit on a force plate by 'Left' or 'Right', or input 'invalid' in the column (indicated in yellow in Image 1). This will generate clean and recognizable patterns in case of a gait cycle analysis (Image 3). If all force plates have invalid data, no force plate graphs are shown.
Alternatively, to reach the above described effect you can edit the force plate context on Moveshelf, without having to adjust the C3D again in Nexus. For more information navigate to Add context force plates.
Add spatiotemporal parameters to a trial
To be able to see spatiotemporal parameters in a trial on Moveshelf, you first have to add these to the c3d file of the trial. This can be done by adding the 'Calculate Gait Cycle Parameters' operation to your data processing pipeline in Nexus.
This operation calculates the parameters in the first complete gait cycle for each side in each trial, also if multiple gait cycles are defined in a trial (see Vicon Nexus Documentation). Seeing as this is single-cycle data and not an average, only one value will be shown for each parameter on Moveshelf in trial view.
Normalize data to body weight or mass
It is possible to visualize ground reaction force normalized to body weight (%BW) or body mass (N/kg). A data structure requirement for this optional report template setting is that the C3D file has to contain body mass information. The moments and powers are provided by default in the C3D as respectively Nm/kg and W/kg, and visualized on Moveshelf as such without the need of body mass information separately in the C3D.
Alternatively, if the C3D did not contain the required information, you can manually add a bodyweight for the subject using add subject information. The date of the body weight should match the exact date of the session, or a warning icon will be shown for the concerning graphs.
Image 1: Automatic categorization and trial content settings in Nexus and the result on Moveshelf.
Image 2: Steps to create additional columns 'Plane' and 'Side' for displaying additional information in the trial name, visible from the left panel navigation menu on Moveshelf.
Image 3: with Left/Right/Invalid information entered in Vicon Nexus, only valid force plate data is shown on Moveshelf.
 This feature is optional and only visible to Enterprise customers with this feature enabled.