Get in touch

Get in touch

Prefer using email? Say hi at hello@moveshelf.com

    This section provides information on how to manually upload data to Moveshelf, checking the upload status, editing uploaded files, and modifying trial names.
    Manual data upload
    When uploading data manually, you first need to create a session. Within this session, you can add conditions and trials. See the image below for a visualization of all steps.

    Add condition
    • Click on ‘Add condition’ to add a new condition to this session.
    • Insert a condition name (e.g., barefoot, intervention or clinical test) and click on ‘Add’.

    Add trials
    • The first trial is automatically shown when you have added a condition. In one trial you can upload different types of data that belong to one, synchronized capture (e.g., c3d and video). Different captures should be uploaded as separate trials.
    • Click on ‘+ Add trial’ to add more trials within one condition.

    Upload data to a trial
  • Upload data to a trial by dragging and dropping it from your file explorer or click and upload. The files will show up underneath the trial in ‘Available data’. Please do not close the Moveshelf page or navigate away on the page while the green bar is still visible.
  • After processing is done, Moveshelf will show what kind of data is uploaded in the trial, using different icons (e.g., graphs, video). Now your trial is available for viewing and editing.


Upload status
    Moveshelf shows the status of the uploading files when you expand the header Data of a trial in the Edit session interfase. Please see all possible statusses in the list below, where the numbers correspond to the numbers in the image at the bottom of the article.

    1. Uploading: while uploading you will see a green bar next to each file. Please do not close the Moveshelf page or navigate away on the page while the green bar is still visible.
    2. Processing: once uploading is complete, an orange bar will appear to indicate the processing of the data. It is safe to navigate again to other pages as this process is performed in the backend and will not be disturbed by navigating away from the page.
    3. Uploaded: the file is uploaded and processed completely, the bar is not shown anymore. A graph and/or video icon for each trial are shown to indicate respectively movement analysis data and video data are included.
    4. Uploading warning: since this file was uploaded, the data processor of moveshelf has been updated. If you notice any unexpected visualizations of your data in a trial or report, please try to re-upload the trial. When in doubt or if you don't have the original data anymore, please contact Moveshelf support and we can help you to solve this warning.
    5. Uploading failed: there are one or more upload errors with this item, possibily due to an unexpected structure in your data file. Please contact Moveshelf support for help.


Edit uploaded files
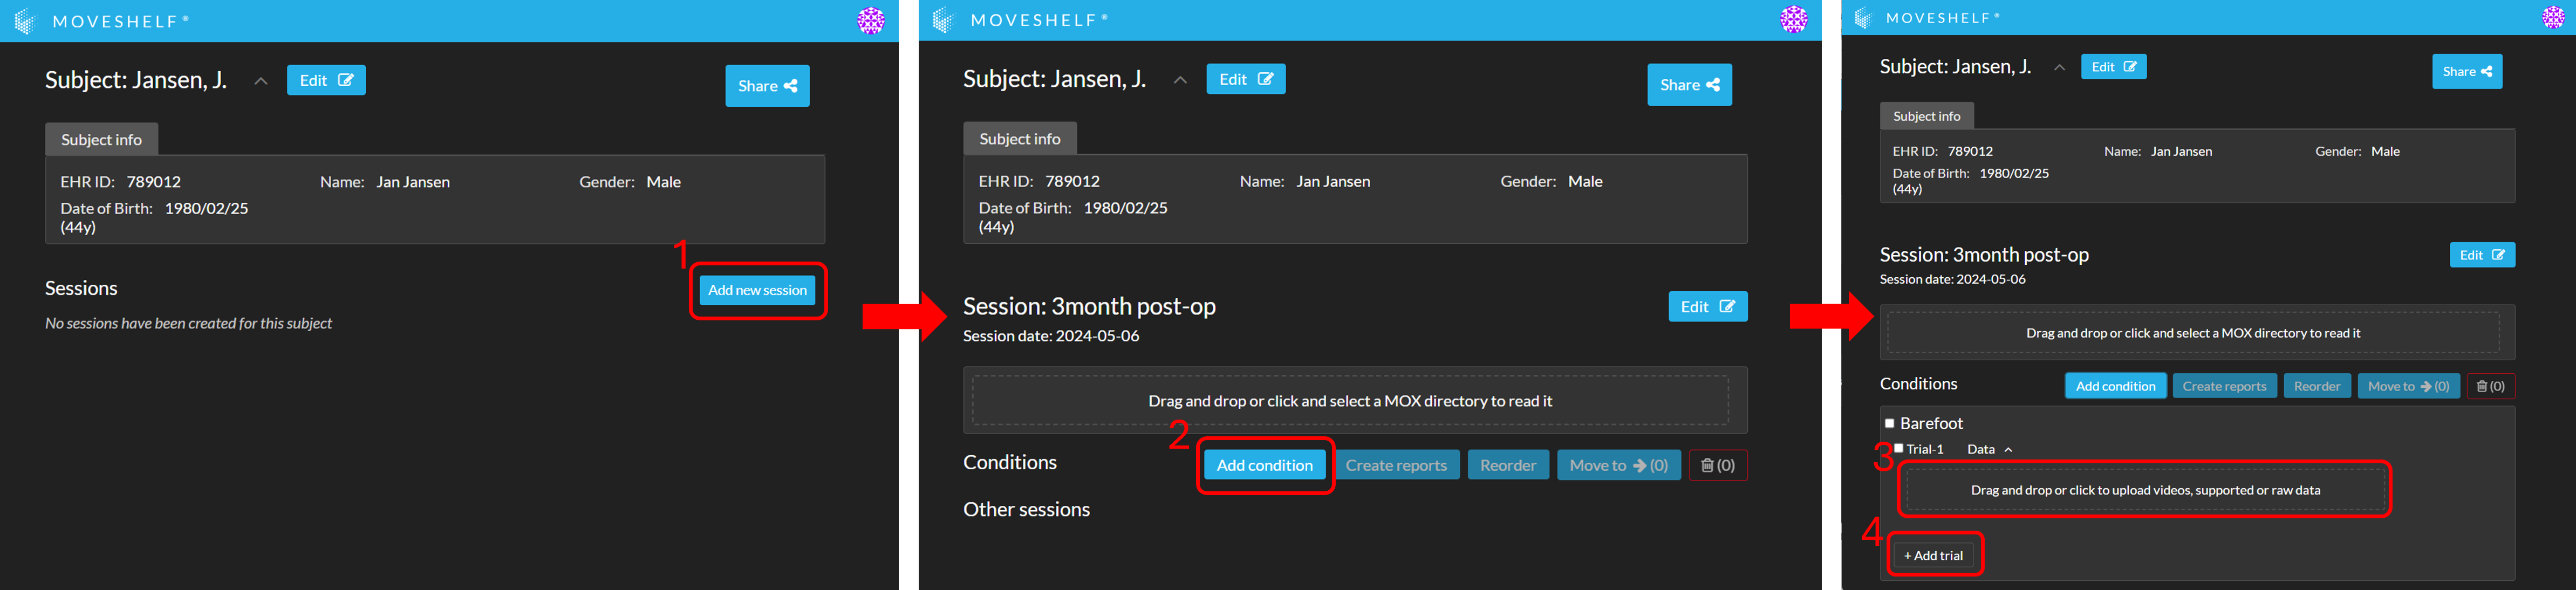
After a successful upload on Moveshelf, you will be able to manually edit files within your trials:
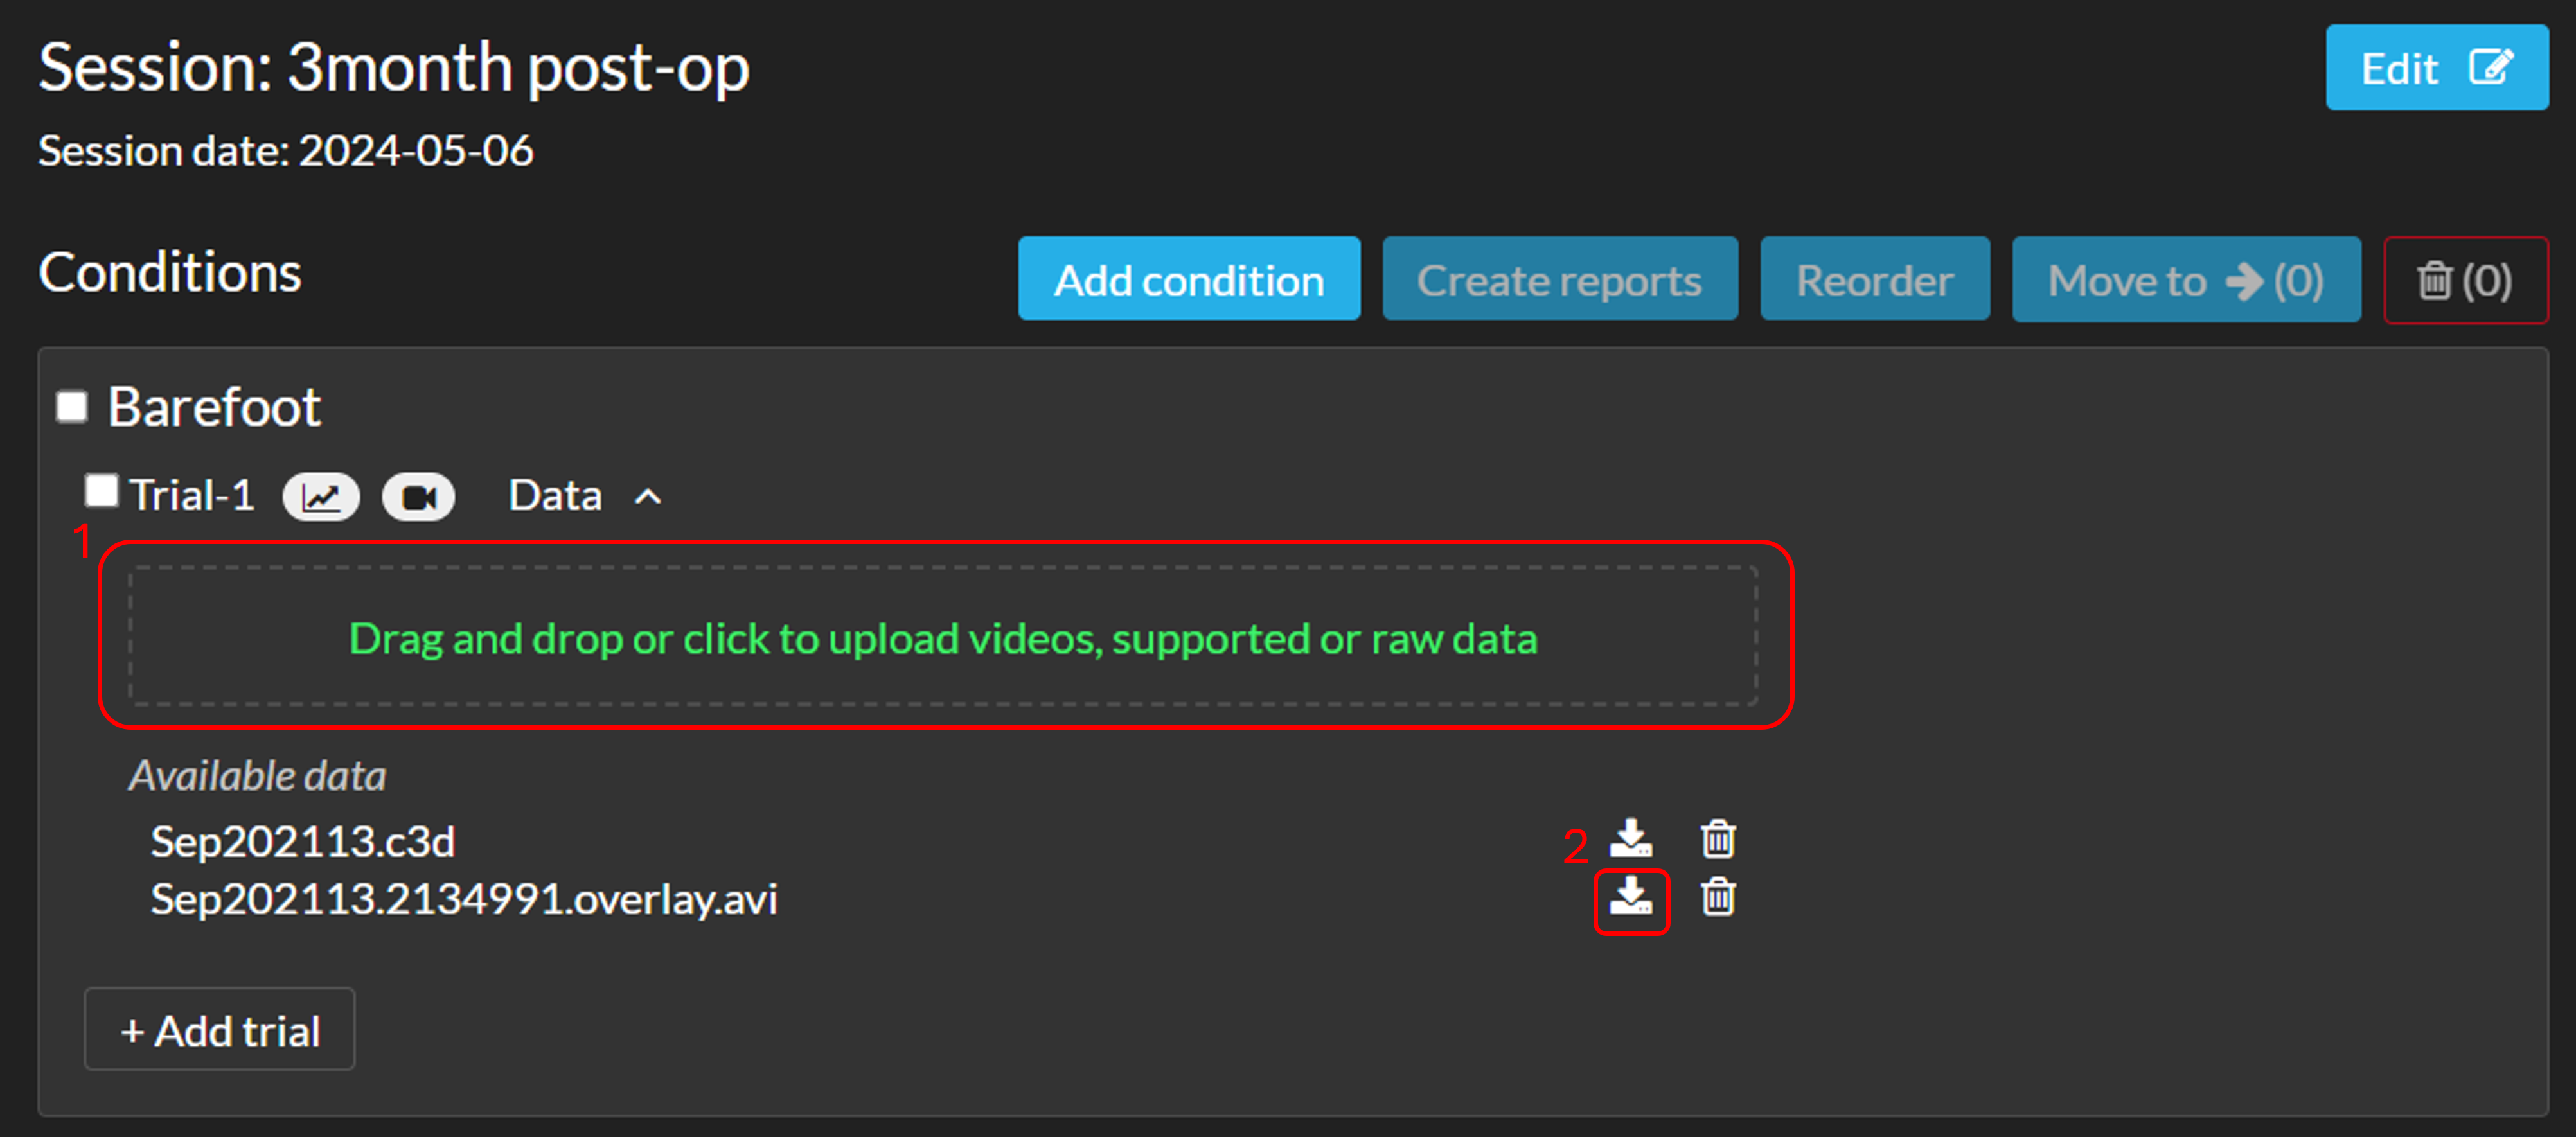
  1. You can replace an existing .C3D file for an updated .C3D file. To replace, drag the updated file with the exact same name in the trial upload box (see image below, 1). The file will be reprocessed automatically. To see the updated trial, please refresh the page.
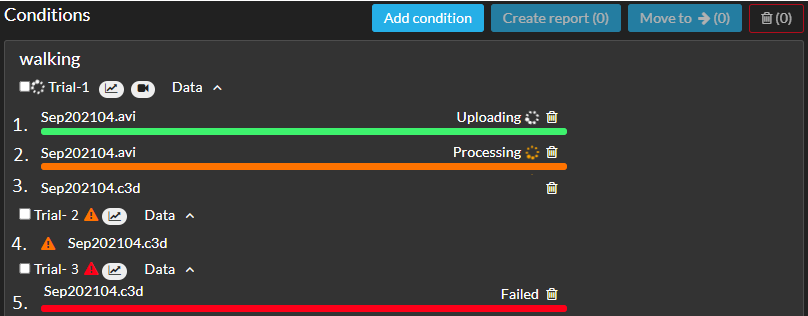
  2. You have the option to delete a file from a trial by clicking on the recycle bin.
  3. You are able to download additional files from a trial. This can be done by clicking on the download button next to the recycle bin (see image, 2)


Edit trial name
    If you are on the trial page, you can change the trial name by clicking on ‘Edit’ on the right side next to the trial name.